Newspaper Flowers (or
trees)
1.
Use a double-size sheet of
newspaper. Measure 10” from the top and
10” from the bottom of
the page and cut 2 strips. Discard the
middle piece. (You may find it easier to
simply have students cut the newspaper in half.)
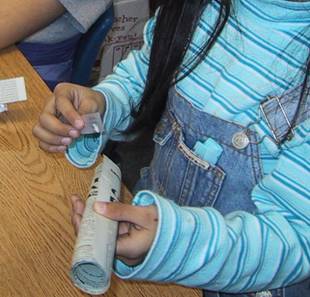
2.
Roll one strip loosely so it
forms a tube about 1 ½” in diameter.
Just before you come to the end of the strip, add a second strip
(overlapping ends) and continue rolling.
3.
Tape the end of the newspaper in the
middle so the tube won't come unrolled.
(This gives students a "marker" to show them how deep to make
the cuts.)
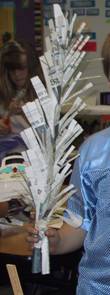
4.
Insert one point of the
scissors into the tube you have made.
Make 5-8 cuts from the top of the roll.
(Provide adult scissors since children’s school scissors will not cut
the multiple layers of newspaper.) Cut
about halfway through the roll. (This is
where the tape marker is helpful to students.)
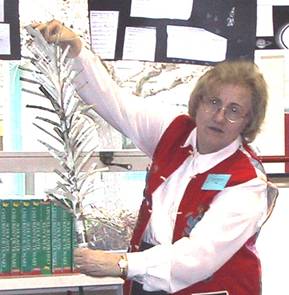
Gently pull up gently on the innermost layer of one of the cut
strips. The flower will magically start
to “grow”. Pull carefully so the strip
does not tear. Do not pull too much or
the magic will come undone!
Note: Comics, colored ads, old sheets of gift wrap
paper or colored tissue paper makes beautiful flowers. Children might use crayons to color the
newspaper strips before rolling and cutting.
Directions
(with diagrams) for the tree (flower) can also be found in “The Apple
Thieves” in The Family Storytelling Handbook, Anne Pellowski,
Macmillan Publishing Company,
Back to Recycling With the Story Lady